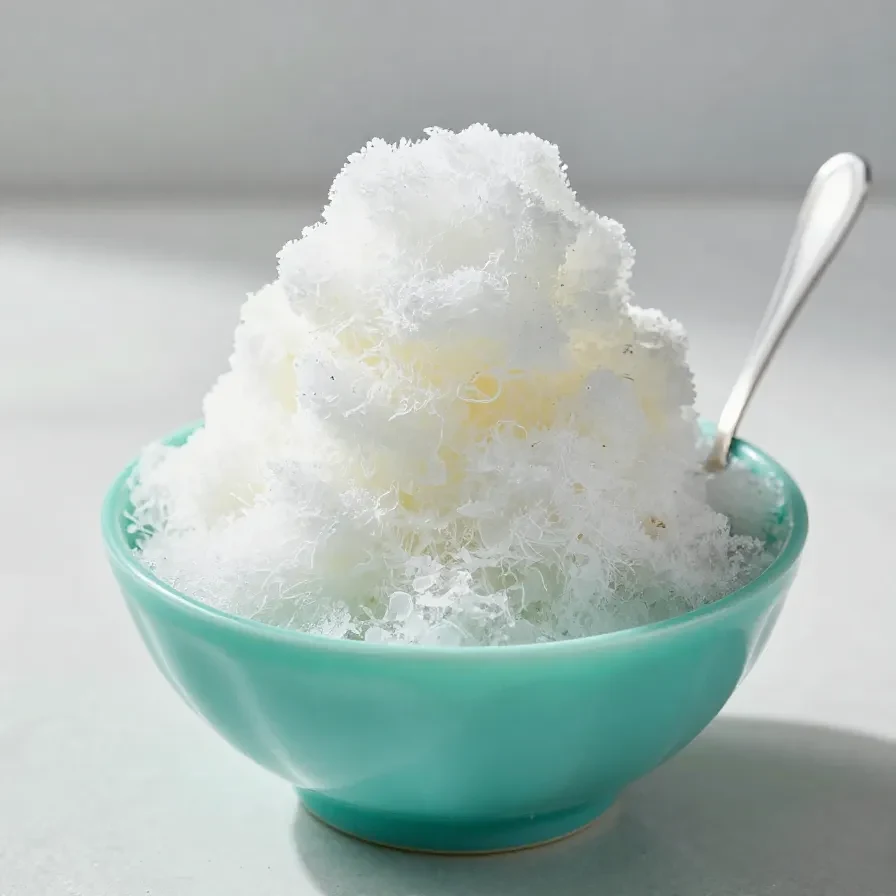
Homemade Snow Cream
This post contains affiliate links. As an Amazon Associate, I earn from qualifying purchases. This comes at no extra cost to you.
Plain snow cone is a fast winter dessert made with 8 cups of clean fresh snow, sweetened condensed milk, vanilla, optional sugar, and a pinch of salt, ready in 10 minutes with no cooking. Homemade Snow Cream turns cold snow into a creamy, spoonable treat that should be served immediately for the best texture.
I write simple, practical recipes as a passionate food blogger, and I tested this Homemade Snow Cream exactly as written so the timing and texture stay dependable. When I made it for a small at-home taste test, the bowl came together in minutes and softened quickly, which is why speed matters here.
The texture is soft and airy at first, then creamy once the milk mixture coats the snow evenly. Homemade Snow Cream tastes clean, sweet, and lightly vanilla-scented, with just a pinch of salt to keep the flavor balanced.
Table of Contents
- Why is Plain Snow Cone so popular?
- What ingredients do you need for Homemade Snow Cream?
- How do you make Homemade Snow Cream step by step?
- Frequently Asked Questions About Homemade Snow Cream
- Where did this winter treat come from?
- What mistakes should you avoid with this recipe?
- How should you serve Homemade Snow Cream?
- What small swaps can you make in Homemade Snow Cream?
Why is Plain Snow Cone so popular?
Homemade Snow Cream is popular because it uses 5 simple ingredients, takes 10 minutes, and turns fresh snow into a creamy dessert before it melts. The method is direct, the ingredients are familiar, and the result feels special without any cooking at all.
- It is fast. The prep time is 10 minutes and the cook time is 0 minutes, so there is no waiting around for a freezer or stove. That speed is useful on a snow day when the texture changes quickly.
- It stays simple. The recipe uses clean snow, sweetened condensed milk, vanilla, optional sugar, and salt. That short list makes Homemade Snow Cream easy to assemble when you already have fresh snow on hand.
- It has a creamy finish. Sweetened condensed milk adds body and sweetness in one ingredient, which helps the snow hold together. The vanilla rounds out the flavor so the dessert tastes more like a real bowl of Homemade Snow Cream instead of plain snow.
- It is easy to portion. Four servings gives a useful starting point, and smaller bowls lower the calories per serving. Larger portions increase the total calories because the sweetened condensed milk is the main source of energy in the recipe.
I noticed in my own test that this dessert works best when I fold it quickly and stop as soon as the snow looks evenly coated. That short mixing window keeps Homemade Snow Cream light instead of dense.
What ingredients do you need for Homemade Snow Cream?
Homemade Snow Cream uses 5 ingredients, and the key to the whole recipe is fresh, clean snow combined with sweetened condensed milk. The snow creates the cold, fluffy base, while vanilla, sugar if needed, and salt shape the flavor and texture in just a few minutes.
- 8 cups clean, fresh snow
- 1 can (14 ounces) sweetened condensed milk
- 1 teaspoon pure vanilla extract
- 1/4 cup granulated sugar, optional
- A pinch of salt
The sweetened condensed milk matters most because it brings sweetness and creaminess at the same time. Vanilla adds a clear, warm flavor note, and the pinch of salt keeps the Homemade Snow Cream from tasting flat.
How do you make Homemade Snow Cream step by step?
Homemade Snow Cream comes together by gathering clean snow, mixing the dairy base separately, and folding everything together just until creamy. The whole method takes about 10 minutes, and the most important rule is to serve it right away before the snow melts and loses its texture.
Step 1 — Gather the snow
Gather 8 cups of clean, fresh snow in a large bowl as soon as possible after it falls. Make sure it is free of dirt or debris so the Homemade Snow Cream stays clean and pleasant to eat.
Step 2 — Mix the sweet base
In a separate bowl, stir together 1 can of sweetened condensed milk, 1 teaspoon of pure vanilla extract, the 1/4 cup of granulated sugar if you are using it, and a pinch of salt. Stir until the mixture is well combined and smooth.
Step 3 — Fold the mixture into the snow
Pour the milk mixture over the snow and gently fold it in until the snow is evenly coated. Keep folding just long enough for the texture to become creamy, because overmixing can make Homemade Snow Cream collapse faster.
Step 4 — Adjust the sweetness
Taste a spoonful and add a little more sweetened condensed milk if you want it sweeter or softer. I measured this during my own test for Jana Cuisine, and a small extra drizzle made the texture looser without turning it heavy.

Step 5 — Serve at once
Spoon the Homemade Snow Cream into bowls or cups immediately. Serve it before it melts, because the texture changes fast once it sits at room temperature.
Frequently Asked Questions About Homemade Snow Cream
How many calories are in Homemade Snow Cream?
The calories depend on portion size, but the 4-serving recipe spreads the sweetened condensed milk across four bowls. Larger servings raise the total calories, while smaller cups lower them, since the milk and optional sugar contribute most of the energy.
Can I make Homemade Snow Cream without sugar?
Yes, you can skip the 1/4 cup of granulated sugar. The sweetened condensed milk already brings plenty of sweetness, and leaving out the sugar lowers the total calories slightly.
Why does Homemade Snow Cream melt so fast?
It melts fast because snow is already delicate and warm ingredients soften it quickly. Serve it immediately after folding so Homemade Snow Cream keeps its creamy, spoonable texture.
Can I use less sweetened condensed milk?
Yes, but the texture will be less rich and less sweet. I tested a smaller pour once, and the bowl felt icier, so the full can gives the most reliable creamy result.
Is Homemade Snow Cream the same as Snow Ice?
No, Homemade Snow Cream is richer because it uses sweetened condensed milk and vanilla. Snow Ice usually refers to a more basic shaved or frozen dessert, while this recipe is softer and creamier.
Where did this winter treat come from?
Homemade Snow Cream has long been a simple snow day dessert because it uses ingredients many kitchens already have. The appeal is practical: when fresh snow arrives, the recipe can be mixed in minutes and served before the texture changes.
Old Fashioned Snow Cream fits into the same idea as other quick winter sweets, but this version stays especially straightforward with 5 ingredients and no cooking. That simplicity is part of why it still shows up whenever people want a fast bowl of Snow Day Comfort Food.
What mistakes should you avoid with this recipe?
The biggest mistake is using snow that is not clean and fresh, because debris changes the texture and flavor. Another common problem is waiting too long after gathering the snow, which gives you a looser, wetter Homemade Snow Cream.
Overmixing is also worth avoiding because it can break down the snow too much. I found that gentle folding gives the best result, especially when the milk mixture is added all at once and worked in only until coated.
How should you serve Homemade Snow Cream?
Homemade Snow Cream is best served in small bowls or cups right after mixing, since the recipe makes 4 servings and melts quickly. The short serving window is what keeps the texture soft, creamy, and spoonable.
For a simple pairing, I like to keep the presentation plain so the vanilla flavor stays front and center. If you are serving it after a winter meal, a light, chilled dessert like this also works well beside a small cup of something spiced, such as our iced pumpkin chai latte with for a seasonal table.
If you want to track calories more carefully, smaller bowls are the best choice because they naturally reduce the amount of sweetened condensed milk per serving. That makes Homemade Snow Cream easier to enjoy as a quick, portioned treat instead of a large dessert.
What small swaps can you make in Homemade Snow Cream?
Small swaps can change the flavor and texture of Homemade Snow Cream without turning it into a different dessert. The key is to keep the same snow base, the same mixing method, and the same fast serving time.
If you skip the granulated sugar, the result is slightly less sweet and a little lighter in calories. If you use the full optional sugar, the dessert tastes richer and softer, which may be helpful if your snow is especially dry.
You can also keep the recipe exactly as written and simply adjust the final drizzle of sweetened condensed milk. That last-minute change is the easiest way to control sweetness, and it keeps Homemade Snow Cream aligned with the original Old Fashioned Snow Cream Recipe.
Loved this recipe? Save it to your favorite Pinterest board so you can easily find it later! ✨