Scary Face Pies
This post contains affiliate links. As an Amazon Associate, I earn from qualifying purchases. This comes at no extra cost to you.
Scary Face Pies
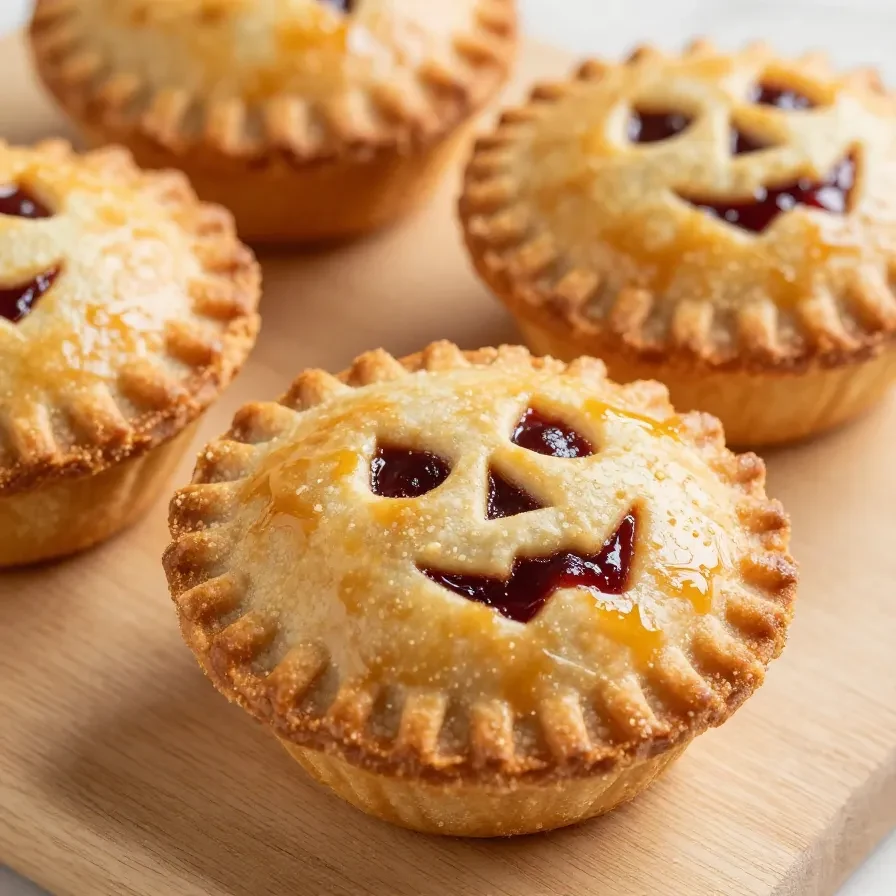
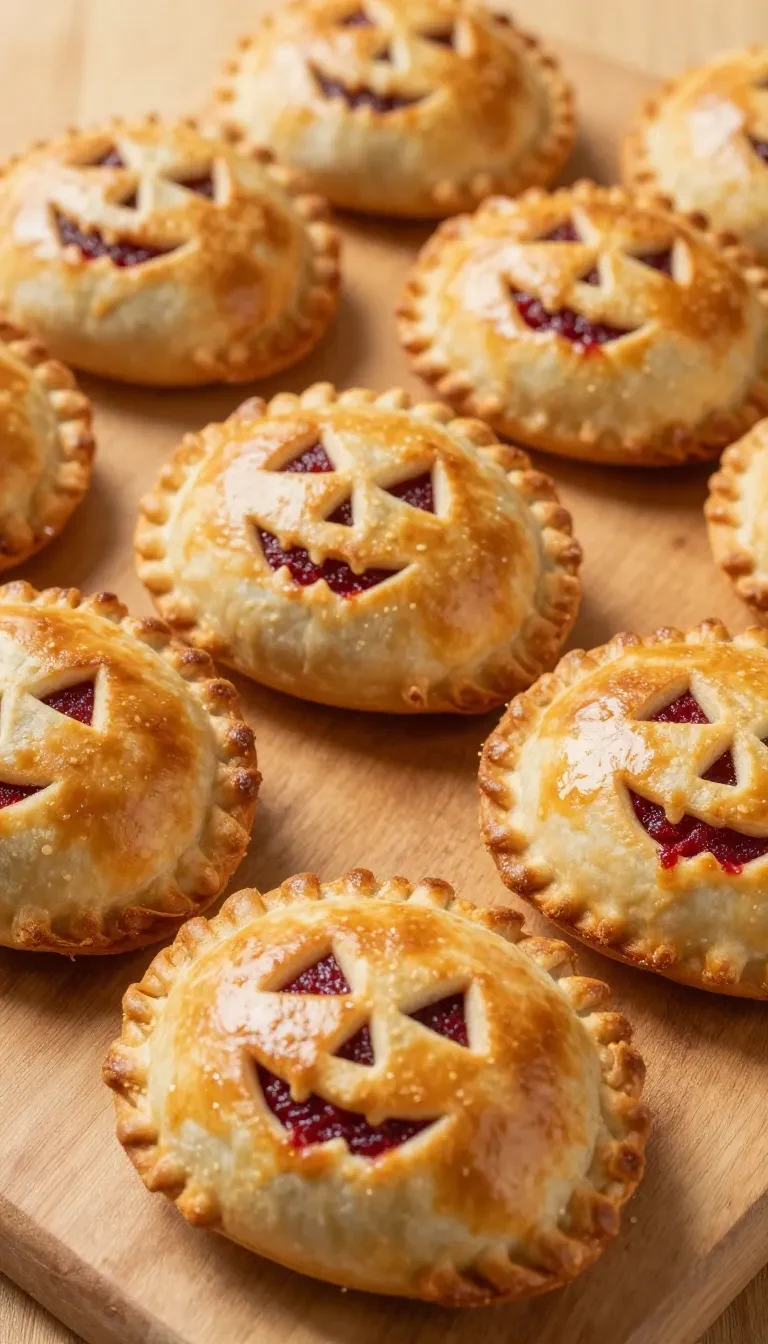
Scary face pies are a festive treat made with flaky pie crusts, spiced pumpkin filling, and decorated with haunting chocolate and candy faces. Ready in under 40 minutes, this recipe yields eight mini pies that are perfect for Halloween. These warm, spiced pies combine a buttery crust with sweet pumpkin for a fun and delicious dessert.
As a food blogger, I enjoy creating recipes that are both imaginative and easy to make—Scary Face Pies fit the bill perfectly for any spooky occasion.
Table of Contents
- Why make Scary Face Pies?
- What ingredients do you need for Scary Face Pies?
- How do you make Scary Face Pies step by step?
- Frequently Asked Questions About Scary Face Pies
- Common mistakes to avoid with Scary Face Pies
- How to store and serve your Scary Face Pies
Why make Scary Face Pies?
Scary Face Pies are the perfect dessert for Halloween, offering both spookiness and comfort. They’re easy to make and fun to decorate for kids and adults alike.
- Easy for beginners: With simple, ready-made pie crusts, anyone can make these effortlessly.
- Festive design: Personalize each pie with scary or funny faces using chocolate chips and candy eyes.
- Quick bake time: Ready to eat in just 15-18 minutes in the oven.
- Perfect for parties: These pies are small and handheld, making them great for Halloween gatherings or movie nights.
What ingredients do you need for Scary Face Pies?
To make Scary Face Pies, you’ll need basic pie-making supplies and a few fun decorations. Here’s everything you’ll need:
- 1 package refrigerated pie crusts (2 crusts)
- 1 cup canned pumpkin puree
- 1/3 cup granulated sugar
- 1 teaspoon ground cinnamon
- 1/4 teaspoon ground nutmeg
- 1/4 teaspoon ground ginger
- 1 egg
- 1 tablespoon milk
- 1/4 cup chocolate chips (for decorating)
- 1/4 cup candy eyes or small round candies (for decorating)
The canned pumpkin puree brings a naturally rich and sweet flavor to the filling, while candy eyes and chocolate chips add the final spooky touches.
How do you make Scary Face Pies step by step?
Making Scary Face Pies is straightforward and fun, perfect for getting creative in the kitchen. Here are the step-by-step instructions:
Step 1 — Prepare the oven and workspace
Preheat your oven to 375°F (190°C) and line a baking sheet with parchment paper. This ensures the pies bake evenly and don’t stick.
Step 2 — Cut the pie crust
Roll out the pie crusts on a clean surface. Use a 4-inch round cookie cutter to create about 8 circles in total.
Step 3 — Make the pumpkin filling
In a mixing bowl, combine the pumpkin puree, granulated sugar, cinnamon, nutmeg, and ginger. Stir until fully blended for a smooth filling.
Step 4 — Assemble the pies
Spoon 1 to 2 tablespoons of the pumpkin mixture onto half the pie crust circles, leaving a small border. On the remaining circles, cut out scary shapes like eyes or mouths to form the “faces.”


Step 5 — Seal the pies
Place the “face” crusts over the filled ones, pressing gently to seal the edges. Use a fork to crimp the edges for a decorative and secure seal.
Step 6 — Apply the egg wash
In a small bowl, whisk together the egg and milk. Brush this mixture lightly over the top of each pie to help them bake to a golden brown.
Step 7 — Bake and decorate
Bake the pies for 15-18 minutes or until the crust turns golden. Once slightly cooled, decorate with chocolate chips and candy eyes by gently placing them in the cut-out areas or securing them with melted chocolate.
Frequently Asked Questions About Scary Face Pies
Can I use homemade pie crust instead of refrigerated?
Yes, you can use homemade pie crust if you prefer. Just ensure it’s rolled out evenly to about 1/8-inch thickness for easy cutting and assembly.
How can I prevent the filling from leaking?
Make sure to leave a small border around the edges when filling the pies and press the edges firmly to seal. Crimping with a fork helps prevent leaks.
How long do Scary Face Pies last?
These pies can be stored in an airtight container at room temperature for up to two days or in the refrigerator for up to four days.
Can I freeze these pies?
Yes, you can freeze them. Wrap each pie individually in plastic wrap or foil, then store in an airtight container for up to one month.
What other shapes can I cut into the pies?
Besides scary faces, you can carve bats, pumpkins, or witch hats into the crusts for variety. Cookie cutters can make this easier and more precise.
Common mistakes to avoid with Scary Face Pies
Here are a few pitfalls to watch out for when making Scary Face Pies, along with tips to avoid them.
- Overfilling: Adding too much filling can cause the pies to leak during baking. Stick to 1-2 tablespoons per pie.
- Edges not sealed properly: If edges aren’t sealed well, the filling can spill out. Take extra time to press and crimp the edges securely.
- Skipping the egg wash: The egg wash gives the pies a golden finish. Don’t skip this step for optimal results.
How to store and serve your Scary Face Pies
Store Scary Face Pies in an airtight container at room temperature for up to two days. For longer storage, refrigerate them for up to four days or freeze for up to one month.
When ready to serve, reheat in a 350°F (180°C) oven for 5-7 minutes to refresh their texture. Pair these pies with a hot cup of apple cider or a scoop of vanilla ice cream for an extra special treat.
Loved this recipe? Save it to your favorite Pinterest board so you can easily find it later! ✨