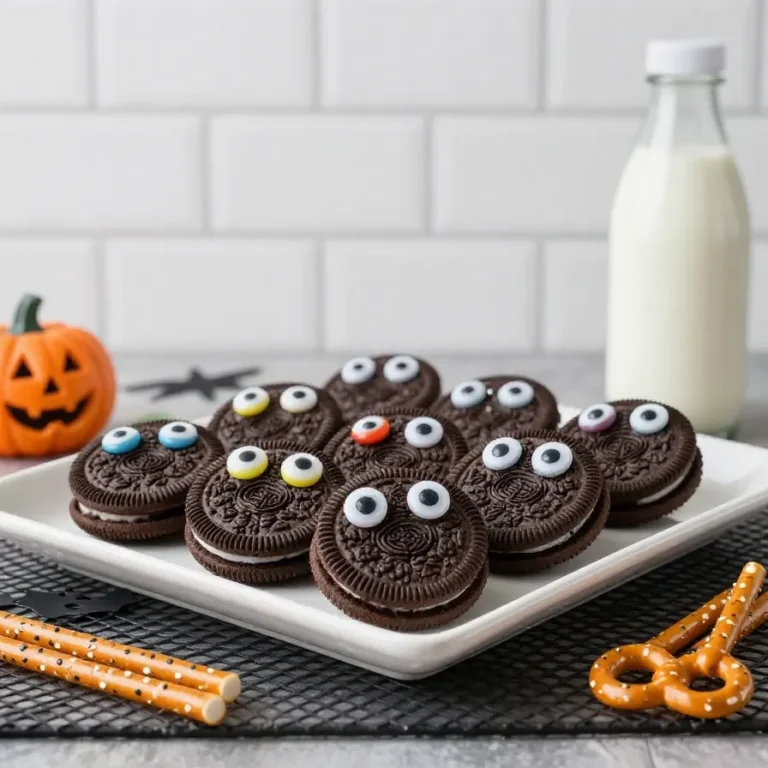

Spooky Oreo Cookies with Googly Eyes
This post contains affiliate links. As an Amazon Associate, I earn from qualifying purchases. This comes at no extra cost to you.
Oreo spider cookies is a festive treat made with creamy white chocolate, crunchy Oreo cookies, and playful candy googly eyes. Ready in just 30 minutes, this Halloween dessert combines simplicity and creativity to delight kids and adults alike. The smooth chocolate coating and fun spooky designs make it irresistible for any spooky celebration.
As someone who loves creating recipes that bring out smiles, I couldn’t resist turning one of my favorite store-bought treats into this playful, Halloween-themed dessert. These cookies are a quick, family-friendly activity that guarantees a deliciously spooky result!
Table of Contents
- Why choose Spooky Oreo Cookies with Googly Eyes?
- What ingredients do you need for Spooky Oreo Cookies with Googly Eyes?
- How do you make Spooky Oreo Cookies with Googly Eyes step by step?
- Frequently Asked Questions About Spooky Oreo Cookies with Googly Eyes
- Common mistakes to avoid when making Spooky Oreo Cookies
- Easy ingredient swaps and substitutions
- Serving ideas and what to pair with Spooky Oreo Cookies
- Where did Spooky Oreo Cookies with Googly Eyes originate?
Why choose Spooky Oreo Cookies with Googly Eyes?
Spooky Oreo Cookies with Googly Eyes are beloved for their ease, creativity, and festivity. This recipe is perfect for Halloween parties, school events, or family craft nights, offering a fun and quick way to celebrate the season.
Decorating these cookies with googly eyes and spooky designs makes them a hit with kids and adults alike. With only two main steps—dipping and decorating—you’ll get festive treats without spending hours in the kitchen. With 24 cookies per batch, there are plenty to go around at your Halloween gathering.
What ingredients do you need for Spooky Oreo Cookies with Googly Eyes?
This recipe requires only six ingredients, and they’re all easily found at your local grocery store. These pantry staples make for an accessible and delicious treat!
- 24 Oreo cookies
- 1 cup white chocolate chips
- 1 teaspoon coconut oil (optional, for smoother melting)
- 48 candy googly eyes
- Black food coloring gel (optional, for extra spooky details)
- Parchment paper or wax paper
The white chocolate chips provide a smooth and creamy base for decorating, while the googly eyes instantly give the cookies their fun, spooky Halloween vibe.
How do you make Spooky Oreo Cookies with Googly Eyes step by step?
Making Spooky Oreo Cookies with Googly Eyes is straightforward and fun. Follow these simple steps to create spooky and delicious Halloween treats in no time.
Step 1 — Prepare the baking sheet
Line a baking sheet with parchment paper or wax paper and set it aside for later use.
Step 2 — Melt the chocolate
In a microwave-safe bowl, combine white chocolate chips and coconut oil (if using). Microwave in 15-20 second intervals, stirring after each interval, until completely melted and smooth.
Step 3 — Coat the Oreos
Using a fork or dipping tool, dip each Oreo cookie into the melted white chocolate, ensuring it is evenly coated. Tap off any excess chocolate and place the coated Oreos on the prepared baking sheet.
Step 4 — Add googly eyes
Before the chocolate sets, place two candy googly eyes on each Oreo. Press them gently into the chocolate for a secure fit.


Step 5 — Decorate with spooky details
If desired, use black food coloring gel to add spooky features like mouths, stitches, or spiderweb designs onto the cookies.
Step 6 — Let the chocolate set
Allow the cookies to rest at room temperature or refrigerate for 15-20 minutes until the white chocolate hardens completely.
Step 7 — Serve
Arrange the spooky Oreo cookies on a Halloween-themed platter and enjoy with friends and family!
Frequently Asked Questions About Spooky Oreo Cookies with Googly Eyes
Can you make these cookies ahead of time?
Yes, these cookies can be made up to two days in advance and stored in an airtight container.
What if I don’t have Goog jelly?
You can skip this step or substitute with different food-safe decorating colors.
How can I ensure the white chocolate doesn’t burn?
Microwave the chocolate in short 15-20 second intervals and stir frequently.
Can I make these cookies nut-safe?
Yes, substitute coconut oil with a nut-free alternative or omit it entirely.
What is the best way to store these cookies?
Store Spooky Oreo Cookies with Googly Eyes in an airtight container at room temperature for up to 5 days.
Common mistakes to avoid when making Spooky Oreo Cookies
White chocolate burns easily, so always melt in short intervals and stir thoroughly. Excess chocolate can pool and prevent googly eyes from sticking securely. Ensure the cookies fully harden before serving for the best presentation.
Easy ingredient swaps and substitutions
Use candy melts or colored melting wafers for a fun twist on the spooky design. Create edible eyes using small dots of white icing with black gel centers. Use vegetable shortening for a nut-free option that still ensures a smooth chocolate coating.
Serving ideas and what to pair with Spooky Oreo Cookies
The creamy chocolate pairs perfectly with a warm cup of cocoa. Add a healthy touch to your Halloween spread with spooky-themed fruit designs. Serve alongside ghostly punch for a fully themed beverage and dessert combo. Pair with themed goodies like our heart-shaped slice and bake cookies for a colorful dessert table.
Where did Spooky Oreo Cookies with Googly Eyes originate?
While Oreo decorations have long been associated with fun desserts, this specific spin using googly eyes became popular with Halloween-themed recipes. Inspired by simple baking methods and playful design, it’s an easy way to transform store-bought cookies into festive holiday treats.
The concept blends creativity with accessibility, showing that even busy families can enjoy homemade-looking crafts without complex ingredients or tools.

Loved this recipe? Save it to your favorite Pinterest board so you can easily find it later! ✨