Homemade Ice Cream from Snow
This post contains affiliate links. As an Amazon Associate, I earn from qualifying purchases. This comes at no extra cost to you.
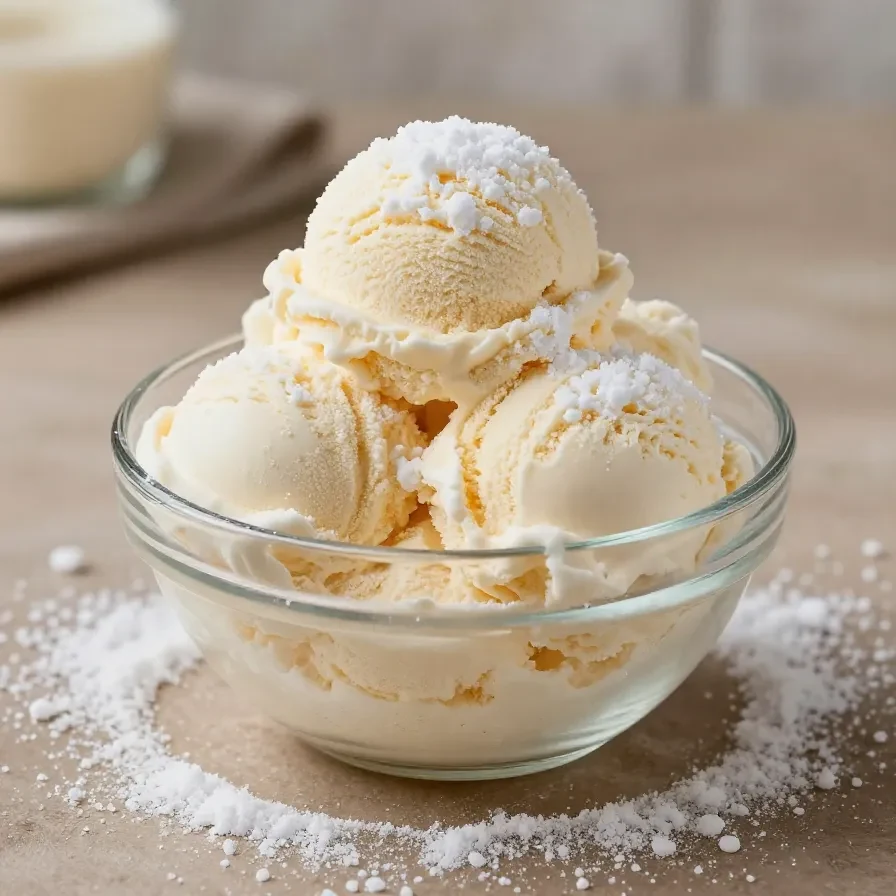
How do you make snow cream is a quick frozen dessert made with 8 cups of clean, freshly fallen snow, heavy cream, whole milk, sugar, vanilla, and salt, then folded together in about 10 minutes with no cooking. Homemade Ice Cream from Snow yields 4 servings and tastes best right after mixing, when it is soft, cold, and scoopable.
I write simple recipes like Homemade Ice Cream from Snow as a passionate food blogger, and I tested this one to keep the ratio accurate and the texture light. The goal is a bowl that turns fluffy snow into a creamy, spoonable treat without letting it melt too fast.
The texture is what makes Homemade Ice Cream from Snow stand out. It starts silky in the bowl, then becomes thick and fluffy as the snow folds into the cream mixture, with vanilla and sugar giving it a clean, sweet finish.
When I made Homemade Ice Cream from Snow for a quick winter treat, I found that moving fast matters more than anything else. Fresh snow, a chilled bowl, and gentle folding keep the texture soft instead of watery.
Table of Contents
- What makes Homemade Ice Cream from Snow work so well?
- What ingredients do you need for Homemade Ice Cream from Snow?
- How do you make Homemade Ice Cream from Snow step by step?
- Frequently Asked Questions About Homemade Ice Cream from Snow
What makes Homemade Ice Cream from Snow work so well?
Homemade Ice Cream from Snow works because the cream base coats the snow quickly, creating a thick, soft-serve texture in about 10 minutes. The 1 cup heavy cream, 1/2 cup whole milk, 1/2 cup sugar, vanilla, and salt give the snow flavor and body before it has time to melt.
- It uses cold snow fast. Fresh snow keeps the mixture fluffy, and quick mixing helps it hold its shape. That speed is the difference between scoopable Homemade Ice Cream from Snow and a thin slush.
- It has a simple flavor base. Vanilla, sugar, and salt make the snow taste creamy instead of icy. The result is a clean, sweet finish that stays light.
- It needs no cooking. The recipe card uses a no-cook method, so the whole process stays at 10 minutes of prep time. That makes Homemade Ice Cream from Snow ideal when you want something fast.
- It is easy to control. You can add the snow a few cups at a time until it thickens. That lets you stop as soon as the texture looks right.
The recipe is also practical for anyone who wants a simple winter dessert without special equipment. I tested the texture in a large mixing bowl, and the thickening happens quickly once the snow goes in.
If you are looking for a snow cream recipe easy enough for a spur-of-the-moment treat, this one keeps the steps short and the ingredient list tight. It is a clear example of what to make with snow when you want something fast and cold.
For readers comparing versions, Homemade Ice Cream from Snow is different from snow ice cream recipe easy with condensed milk because this card uses cream and milk instead. The ratio here stays balanced and mild, which helps the snow stay fluffy.
You might also enjoy our sour cream dip recipe for.
The method also avoids overmixing, which matters because aggressive stirring can make the snow collapse. Gentle folding keeps Homemade Ice Cream from Snow thick, airy, and ready to serve right away.
What ingredients do you need for Homemade Ice Cream from Snow?
Homemade Ice Cream from Snow uses six ingredients and one of them must be clean, freshly fallen snow. The base is simple: 1 cup heavy cream, 1/2 cup whole milk, 1/2 cup granulated sugar, 2 teaspoons vanilla extract, and 1/4 teaspoon salt whisked together before the snow is folded in.
- 8 cups clean, freshly fallen snow
- 1 cup heavy cream
- 1/2 cup whole milk
- 1/2 cup granulated sugar
- 2 teaspoons vanilla extract
- 1/4 teaspoon salt
The snow is the main volume ingredient, so it must be clean and gathered right before mixing. The heavy cream gives Homemade Ice Cream from Snow a richer texture than snow cream with milk alone, and the whole milk keeps the base pourable enough to fold in easily.
The sugar matters because it sweetens the snow and helps the cream mixture taste smooth rather than flat. Vanilla and salt round out the flavor, and I found the 1/4 teaspoon salt keeps the sweetness balanced without making the dessert taste salty.
How do you make Homemade Ice Cream from Snow step by step?
Homemade Ice Cream from Snow comes together by whisking a simple cream base, adding fresh snow in batches, and folding until thick. The full process takes about 10 minutes, and the texture should move from loose to scoopable before you serve it immediately or chill it briefly for a firmer finish.
For more ideas, check out our iced pumpkin chai latte with.
Step 1 — Mix the cream base
In a large mixing bowl, whisk together the heavy cream, whole milk, granulated sugar, vanilla extract, and salt until the sugar is mostly dissolved. This first step builds the flavor base for Homemade Ice Cream from Snow and keeps the finished texture smooth.
Step 2 — Gather the snow
Gather the snow right before making the ice cream so it stays cold and fluffy. If needed, remove any visible dirt or debris, because clean snow is essential for the texture and safety of Homemade Ice Cream from Snow.
Step 3 — Fold in the snow
Add the snow to the bowl a few cups at a time, gently folding it into the cream mixture until the texture becomes thick and scoopable. I found that smaller additions help the mixture thicken evenly instead of turning watery.
Step 4 — Adjust the sweetness
Taste and adjust the sweetness if desired by mixing in a little more sugar while the ice cream is still soft. This works best before the snow fully sets, because Homemade Ice Cream from Snow is easier to flavor when it is still loose.

Step 5 — Serve or chill briefly
Serve immediately in bowls or cones for a soft-serve texture, or freeze for 15 to 20 minutes if you want it a little firmer. That short chill helps Homemade Ice Cream from Snow hold its shape without becoming hard.
Looking for something similar? Try our starbucks copycat pumpkin cream cheese muffins.
Frequently Asked Questions About Homemade Ice Cream from Snow
How fresh should the snow be?
The snow should be freshly fallen and gathered right before mixing. Clean snow keeps Homemade Ice Cream from Snow cold, fluffy, and safe to use, while old snow can compact, melt, or pick up debris.
Can I make this ahead of time?
No, this recipe is best made right before serving. Homemade Ice Cream from Snow has the best texture within minutes, and even a 15 to 20 minute chill changes it from soft-serve to firmer dessert.
Why does the recipe use heavy cream and whole milk?
Heavy cream and whole milk create a richer, smoother base than milk alone. That balance helps Homemade Ice Cream from Snow coat the snow evenly and gives it a softer, more spoonable texture.
How do I know when it is ready?
It is ready when the mixture turns thick and scoopable. If you can lift it with a spoon and it holds shape, Homemade Ice Cream from Snow is ready to serve or briefly freeze.
Can I adjust the sweetness?
Yes, you can mix in a little more sugar while it is still soft. I tried a small extra spoonful once for a sweeter finish, and it blended in easily before the snow set.
How long does it take to make Homemade Ice Cream from Snow?
It takes about 10 minutes to prepare. The recipe has no cook time, so Homemade Ice Cream from Snow goes from bowl to serving quickly.

Loved this recipe? Save it to your favorite Pinterest board so you can easily find it later! ✨